Photoshop for The Terrified
Tonight a Facebook friend asked me how to get started on Photoshop. I've been there. I opened the program and it just sat there, staring blankly at me. I'm not ashamed to say that I gave up; a few times. So here's some info about how to get started.
Double-click on your photoshop icon. When your program is open there will be panels to the right that look like this.
Below that are your PANES. The first is the Content pane, then the Effects pane. Below the Effects pane is the Navigator pane.
Open it by clicking on the triangle. These triangles are for opening and closing the PANES. When you open it there won't be much there. Also your Layers pane and your Favourites pane will drop down to the bottom of the panel. That's alright.
Now we will open a new BLANK FILE. Here's a screenshot.
Go to the FILR menu and click to pull down. Click on NEW and there will be a FLY OUT window to the right. Select BLANK FILE.
Remember, the triangles are for opening and closing.
First name your document.
PRESET is the size of paper. You can select U.S. paper for a standard paper size or photo size; whatever you want. If you want a specific size, then select Custom from that same menu. Below are the width and height boxes. To the right are pull down menus where you can choose the type of measurement you are comfortable with.
Below those is the RESOLUTION. I use 300 pixels/inch. It's standard.
Below that is the COLOUR MODE. RGB colour is fine. That means it will print out the colour that you see you picture on the computer screen.
Below that is BACKGROUND CONTENTS. That is the colour of the background. The best choice is Transparent. That's because later when you use the eraser a background colour will appear. If you erase on a red background when you erase the red will show. With transparent you have a clear background, so when you erase, what you are trying to erase will gone. This will save you endless amounts of misery later on when you want to make a png.
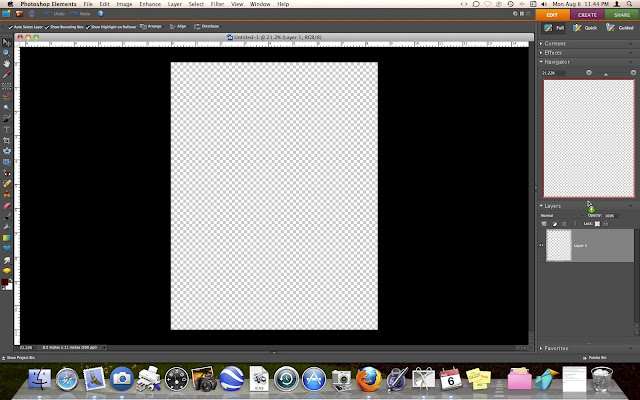
In the bottom right of this box the IMAGE SIZE will appear. Now you're ready to click OK. Your page will appear and to your right your NAVIGATOR will have a thumbnail of your page. this is what it should look like.
Now we are cooking! Notice below your navigator pane there is a LAYERS pane or pallette. Click on it to open it up.Here's what you'll see.
You will notice 2 things: your navigator pane gets smaller and there are a bunch of scary looking things at the top of your LAYERS pane.
First we'll deal with making the navigator pane larger. Where my pointer is there is a handle that you can grab onto. If you slowly move your pointer, the pointer will change. Press down on your mouse. That will enable you to slide the pane up and down making the panes larger or smaller. I like to give more space to the layers pallette because as you add more layers, you'll need more space. I find with the navigator pane I mostly use the slider.
Now let's check out the navigator pane. Top left will be left on normal. It has a pull down menu and when we get a graphic on the page you can try the others.
Next is Opacity. Leave it at 100% for now.
DON"T SKIP OVER THIS.
Okay, this is a good time to talk about what the layers pallette is all about. This pane is the basics of how Photoshop works. Grab a few sheets of coloured paper. Put one piece of paper on your desk. This is your background. Remember the transparent background we made? Next put another sheet on top, or better still if you have a sticker or other graphic lay it on top. This is your second layer. If you do any kind of collage this will start to be familiar. Next element. This is layer three.
So, what you are doing is building a picture from the ground up. You can move these layers up and down and add adjustment layers with effects.
Below are icons. The first one is to add a layer. Go ahead and add a layer by clicking on the icon. Notice that your first layer is called layer 2. Add another layer. This is layer 3. You can change the order of layers by dragging them to the top or the bottom. To the right of those thumbnails are names layer 1, layer 2, etc. Double-click on that name and you can change the name of the layer. Hit RETURN on your keyboard. Done! You just named your layer.
Next is the circle icon. That's to add the adjustment layer I was talking about. Go ahead and click on it. Holy Crap! What happened? Don't panic. Here's what you will see.
Notice where my pointer is. There are 2 squares. The top one is red. The one in the background is white. The red one is Foreground colour and the white one is the background colour. Remember when we chose the background colour? If the colour of the background was turquoise that's what you'd be looking at when you open your page. So if you're wondering why your new file is was turquoise, now you know.
Just click cancel to get rid of the colour. If you clicked OK on the colour box you'll be happy to hear our next icon is to delete a layer. Simply click on the coloured layer and hit the delete icon.
One last note about the layers pallette. You have probably noticed the eyes next to the boxes. If you add a layer and then aren't sure you want to keep it, then click on the eye to make that layer invisible. Layers can be manipulated and worked on using transparency or using effects on the layers pallette. Remember the NORMAL setting on the pallette. Often you can invest a lot of time manipulating the layer. This is when the eye comes in handy. You can turn it off instead of deleting it.
Okay, so you are probably bored to tears by this point and you are itching to make something.
Let's do a quick and dirty (just a term, this is family friendly site) picture with what you have learned. Don't close anything!
Delete all the layers until you are back to layer 1.
Go here and select a background of your choice.
http://graphicsfairy.blogspot.ca/p/search.html
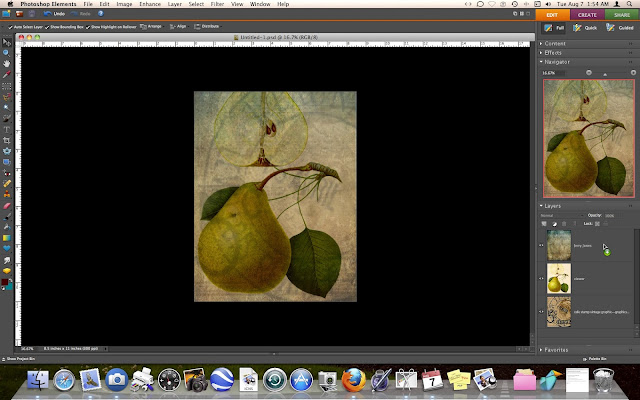
In Photoshop go to FILE->PLACE to place your graphic. Adjust the size by clicking on it and grabbing the corners. Here's mine.
Next click on new layer in the layers pallette for your next layer. The beauty of putting each new element on a separate layer is it's easy to get rid of if you change your mind later.
Next layer add a new element and choose MULTIPLY on layers pallette. Adjust Opacity with the Opacity slider.
Add another layer.This is your texture.
Play around using opacity and effects.
This is our last layer. Go to layer->Flatten image
Go to FILE->Save
Say goodnight Gracie.
Good Luck!


